RationalCraft.com Home > Winscape > The Making Of

Years ago I had built a hacked-up set of Virtual Windows out of engineering scrap. And it sort-of worked which led to dreams of full motion HD video on high quality displays with properly hidden cables. Combined with a motivation to remodel the room, plans began in the spring of 2009 to build the best Winscape I could. Modeling began in Sketchup. Wives were consulted. Cocoa, Quicktime, OpenGL, and Bluetooth programming started to be learned. Tools were bought.
Fast Forward over a lot of room remodeling: the fireplace brick face was removed, the fireplace was sealed up, a new wall was built over the fireplace, ceiling lighting was installed, ethernet was run, the cracked concrete floor was leveled, and a wood floor was installed.
History:
Embedding two 80-pound plasma screens inside of a wall has some unique challenges. Namely, how does one access them if they need servicing, and how does one keep them from overheating?
Access is very troubling, indeed. After lots of ideas and CAD modeling, I built the facade wall in sections so that if I really needed to, I could crack the plaster joint and remove a section of the wall. Thinking with more optimism, I designed each window cavity with a narrow margin through which a few sets of fingers could possibly grip a display enough to lift and tilt it out of the cavity. I won’t find out if the design works until a display needs servicing.
Display Challenges:
Tracking a viewer:
In Winscape v3, I was using a Wii Remote as a cheap tracker, but then the user had to wear a funny necklace for tracking. Since then I have implemented Winscape v4 with support for the KinectTM sensor which needs no accessories and can track multiple people at once. The person closest to the Winscape is declared the winner and that person’s perspective is displayed by Winscape. The Kinect has a simple USB interface to the computer. The user has to give the standard Kinect calibration pose in order to be tracked by the Winscape software. I used the MacTrackNI library by GKGizmos to adapt the OpenNI libraries to native OS X Cocoa APIs.
OpenGL and Quicktime:
To display a HD video onto two different screens, one can share the Quicktime context with the OpenGL contexts so that they would all have access to the frames at the same time. This works out great and uses hardware acceleration as much as possible.
The user’s head location (provided by the Kinect sensor) is used to calculate a proper viewing frustum in OpenGL. Since the view vector is non-orthogonal to the image plane, we have to do some extra work in OpenGL. It’s just like rendering the wall of a CAVE.
My OS X application’s preferences panel allows the user to specify the physical layout of the displays in relation to the tracker origin (Kinect) in a table format. This way, any gaps between the displays are automatically calculated out of the rendered views and the tracking data is now in relation to the displays.
The ATI HD5770 video card in the Mac Pro supports OpenGL textures up to 4096x4096. It also has the horsepower to handle 4k video which is important since we need to zoom into the video when panning it around the screens.
Power:
HDTVs aren’t as smart as computer monitors when it comes to power savings. Computer monitors can sense a signal on their input and automatically turn on/off based on that signal. HDTVs aren’t as convenient. I use a Smart Strip to automatically turn off power to the displays, Kinect, audio amp, and fans whenever the computer is asleep or off. While the Smart Strip worked far better than the APC Power-saving Surge Arrest did at detecting the power draw of the Mac Pro tower, it still isn’t 100% reliable at detecting the difference between sleep and wake power draw. If the temperature of the Smart Strip varies, then so does the sensing circuit. One approach to make this more reliable would be to replace the relay in the Smart Strip with a lower voltage relay capable of being driven by SATA power. This way the strip doesn’t have to sense power draw.
The displays are set to automatically turn on whenever power is restored to them. The Mac is doing an OK job at handling the displays in this manner.
High Resolution Video:
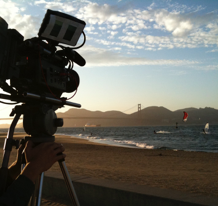
Check out the scene tips page for tips on shooting footage or our scenes page for scenes you can purchase.
Mounting the displays to the wall in portrait orientation was also a challenge since all HDTV viewing is done in landscape orientation. With some minor modifications for bolt width, brackets from Peerless Mounts did the trick (PLP-V4X3 with SF16D).
Plasma displays consume between 250 and 430 watts of power each and therefore generate quite a lot of heat. That heat needs to be vented from the cavity to avoid damage to the electronics and fire risk. I mounted two PVC plastic pipes above the displays that punch through the wall into the garage in the next room. The pipes have very quiet fans on the end of them to pull the warm air out of the cavity into the garage. The pipe below the displays serves as a wiring conduit to connect the displays and peripherals to the computer in the garage. Cool air can enter the cavity via the wiring conduit or via slats underneath the bookshelf.
Kinect is a registered trademark of Microsoft Corporation.